In America, football is a religion. From the peewee leagues all the way up to the NFL, this beloved sport has captured the hearts and minds of people across the country. And while professional football may be the most popular iteration of the game, there’s no reason why you can’t enjoy it on a smaller scale too – like in your own backyard.
That’s where flag football comes in. Flag football is a scaled-down version of traditional football that is perfect for backyard play. It’s easy to learn, and it can be just as exciting (and competitive) as its bigger counterpart. Plus, flag football is a much safer option than traditional tackle football, so everyone can enjoy playing without worrying about getting hurt.
Plus, the sport requires negligible equipment. All you need is a ball and a few flags, which are easy to make at home with some simple materials. So if you’re looking for a fun backyard activity the whole family can enjoy, why not give flag football a try?
Here’s everything you need to know about how to make flag football flags, including a few different DIY options.
What You’ll Need to Make Flag Football Flags
The great thing about flag football is that it doesn’t require much in the way of equipment. All you need is a ball and a set of flags – which can be easily made at home with some basic materials. Here’s what you’ll need to make your own flag football flags:
- Fabric scissors
- Sew-on velcro: about 1 foot
- Cotton webbing for the belt
- 2 D-rings (1-inch)
- Ripstop Nylon (12 x 30 inch rectangle)
- Thread
- Needle
- Sewing machine
How to Make Flag Football Flags – Step by Step
Once you have all of your materials, you’re ready to start making your flag football flags. Here’s a step-by-step guide:
Step 1: Make a Belt
The first step is to make a belt to which the flags will be attached. Cut a piece of cotton webbing (you can find some here) that is 12 inches longer than your waist measurement. For example, if you have a 32-inch waist, you’ll want to cut your webbing to 44 inches.
If you’re making flags for multiple people, you may want to use a larger waist measurement as your standard. This will ensure that the flags will fit a variety of people.
Next, you’ll need to attach the D-rings to the webbing. First, thread the webbing through the D-rings. Then, fold the webbing back on itself and sew the D-rings in place.These will be used to keep the belt in place on the waist.
If you don’t want to make a belt, you could simply make flags that can be tucked into shorts.
Step 2: Make the Flags
Now it’s time to make the actual flags. Cut strips of ripstop nylon fabric that are 30 inches long and 4 inches wide. You should end up with three strips of fabric.
Next, cut a 4-inch square out of one end of each strip of fabric. These squares will be used to attach the flags to the belt.
Now, sew the flag along its edges (piping) so that the flag is finished and the raw edges are hidden. You can do this by hand or with a sewing machine.
Finally, cut a 4-inch strip of velcro and sew it to the back side of each flag. This will be used to attach the flags to the belt.
Step 3: Attach the Flags to the Belt
Now that you have your belt and flags, it’s time to put them all together.
Start by sewing the 4-inch square of fabric to the belt. You have three squares, so you’ll need to sew them evenly spaced along the belt.
Next, cut 4-inch velcro strips and sew them on the fabric over the belt. Make sure the “hook” side of the velcro is facing up.
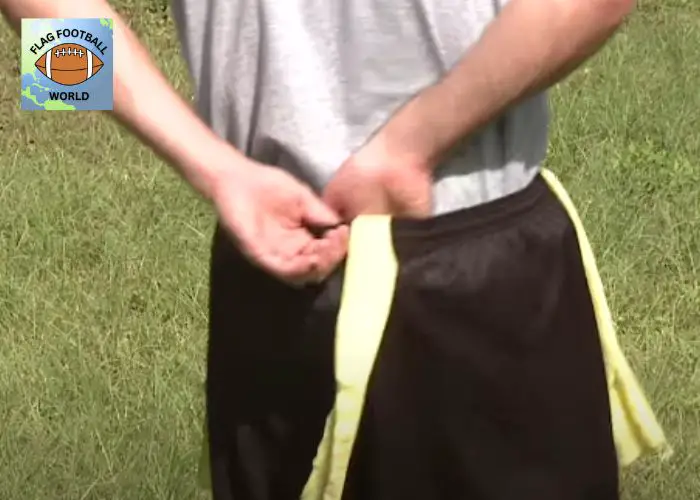
As you can see now, the belt has velcro (hook side up) and the flags have velcro (loop side up). Now all you need to do is attach the flags to the belt!
That’s it! You now know how to make flag football flags. With this simple DIY project, you’ll be ready for some backyard fun in no time.
How to Make Flag Football Flags with Metal Snap Buttons (Press Buttons)
If you don’t have a sewing machine, you can still make football flags. This method uses snap buttons (press buttons) instead of velcro to attach the flags to the belt.
Start by creating the belt as outlined above.
Then, cut three strips of ripstop nylon that are 30 inches long and 4 inches wide. As before, cut a 4-inch square out of one end of each strip.
Next, cut three 4-inch strips of webbing. These will be used to create loops that the snap buttons will attach to.
Now, sew the webbing strips onto the back side of the flags. Sew them near the top edge of the flag, making sure that they are evenly spaced.
Finally, attach the snap buttons to the webbing loops. Make sure that the male and female sides of the snap buttons are facing the correct way.
Now you can simply press the flags onto the belt to attach them. This method is quick and easy, and it doesn’t require a sewing machine.
Make Your Own Flag Football Flags
And you are done! Now you have your own custom-made flag football flags. With this simple DIY project, you can save money and get exactly the flags that you want. So what are you waiting for? Get out there and start playing!

Vance J has played flag football since he was a boy. Since then, he has become a coach and a huge advocate for growing the sport. He loves to write and talk about flag football!


